
This section of the translation process is intended for first time / new translations and should not be used in situations where Eralis Job is in the process of being upgraded. For the upgrade process please refer to the Upgrade Section.
The translation of the resource file requires the following steps:
- Launch the Eralis Resource Translation
- Click on the Open button and browse to the Eralis_Resource.xml file. This is saved in the Eralis Job add-on directory which is generally found at the following location: \Program Files\SAP\SAP Business One\AddOns\Eralis Solutions\Eralis Job. Within the directory, there will be folders for different languages.
- By default, the installation of Eralis Job creates an en language directory, which is the primary English folder and which contains the Eralis_Resource.xml file that should be used as the initial base file.
- If additional languages are required, directories for each language should be created manually. The folder names need to correspond with the language folder names used by SAP.
- Once the file is opened, the main screen of the Resource Translation utility will now contain the text to be translated, along with a blank entry area for the alternate / foreign text. The ID column and the standard text column are read only. Only the alternate text can be edited.
- Click on the Upload button to open a screen similar to the one below.
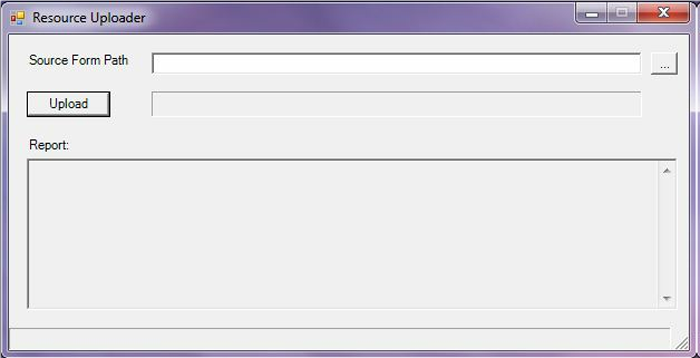
- Click on the ellipses button alongside the Source Form Path field to browse for the directory containing the XML form files. These files are located in the XML sub-directory under the Eralis Job add-ons directory. Once you have located the directory, click on the Upload. This will scan the XML form files and return any additional labels that are required in the resource file. Once the process has completed close the window to return to the main screen.
- At this stage, you are now able to start entering in the alternate text for the various labels. This can be done by either manually entering the text or by clicking on the Copy Standard to Alternate button to transfer the standard text through to the alternate text. By doing this the user only needs to change the necessary values, rather than re-enter all the values.
- Once the alternate text has been entered, click on the Save As button and save the file (which must be labelled as Eralis_Resource.xml) to the required language directory.
If the user wishes to save the work before the translation is complete, follow Step 5 and save the file into a specific language directory. When accessing the file in the future, open the saved file instead of the file in the en directory.
If you are using the utility to personalize the system rather than translate the language, then the amended Eralis_Resource.xml file will need to be saved in the en directory. We would recommend that you make a copy of the standard Eralis_Resource.xml file before you start the process. Failure to do so will require you to re-install the Eralis Job add-on if there are any errors made in the personalization.
IMPORTANT: When you upgrade Eralis Job, the system will delete the Eralis_Resource.xml file in the en directory and replace it with a new file incorporating changes related to the version. Therefore, if you save your altered Eralis_Resource.xml file in the en directory, make sure you have a backup copy saved elsewhere to use as the base when upgrading the application. Failure to save the file in a separate place will mean that any personalization work will need to be redone.
Comments
0 comments
Article is closed for comments.